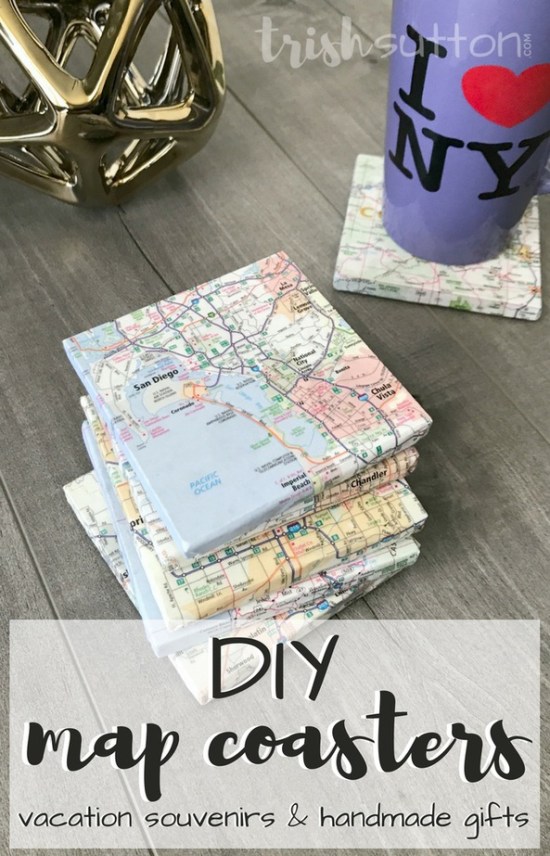
Do you remember when vacation travels included an actual map? Did you know they still make maps? Those maps make awesome vacation souvenirs. DIY Map Coasters.
If I am remembering correctly the last time I used an actual paper map was in 2002. While on a roadtrip with one of my closest friends. She was the co-pilot and official map reader on our several day adventure and I was the driver. I do remember getting lost once and I remember that my co-pilot’s voice changed octaves, unlike my current GPS.
For just a few dollars you can buy one of those folded “old fashion” maps that expand into a large piece of paper which takes up the entire windshield of a car. I ordered a map off of Amazon to create DIY Map Coasters Vacation Souvenirs. (Of course, printing a paper map would serve the same purpose.) However, the actual base of the coaster didn’t cost me a penny
In the past year we have had the floors in our house replaced twice. Believe me we did not plan it that way ten months ago. Nonetheless, we collected MANY floor samples over the past several months from a range of flooring stores. The samples are various floor types; several of them were wood laminate samples. Rather than throw them away after our latest renovation I created DIY Map Coasters with the wood laminate samples. The coasters double as reminders of special memories from our favorite places, including our recent summer travels.
The wood laminate samples we had were rectangle; no worries, I had a simple fix. My husband and his chop saw! He cut a couple inches off each laminate sample to make them into squares. Rather than paint the edges of each square and just cover the top with the map I decided to wrap my coasters like a canvas print.
DIY Map Coasters Vacation Souvenirs
SUPPLIES
Wood Laminate Samples
(from Home Depot or any flooring store)
Paper Map
Spray Adhesive
Mod Podge Glue
Clear Acrylic Sealer
Felt
ADDITIONAL
Saw, Pencil, Scissors, Paint Brush
Lay the square over the city (or place) of choice then use a pencil to outline each square.
Cut the square an inch to two inches larger than the outline then erase the pencil marks.
Spray a layer of spray adhesive over the top of the laminate then center and secure the paper map.
Fold the edges of the map as if you are wrapping a gift. Add Mod Podge glue to each fold.
Paint a layer of Mod Podge glue over both sides and the edges of each coaster. Allow plenty of dry time then paint another layer of Mod Podge glue over the tops and sides of coasters. Repeat a third time then allow the coasters to dry completely.
Spray the tops and sides of each DIY Map Coaster with clear acrylic sealer. (It’s best to spray them outside then leave them on a piece of cardboard or something similar.) Allow dry time then repeat this step two more times.
Once the handmade vacation souvenirs (or gifts) have dried completely add felt squares to the bottom of each one.
These DIY Map Coasters make great souvenirs however they would make awesome gifts too. Grandparent’s Day is just around the corner! A coaster representing the places where grandchildren live would make for a meaningful gift.
If you know someone getting married a thoughtful gift representing the place they were engaged and the place they are getting married would be super unique. And then there is Christmas! Map Coasters would be a sweet gift for all occasions.
Similar handmade gift tutorials by Trish
DIY CERAMIC TILE PHOTO COASTERS


